


I once watched a video online called The Story of Stuff, and although I didn’t have children at the time that I watched it, that 20 minute video totally changed the way I approached the purchasing of baby products when I did become a parent. You can watch that video if it intrigues you, but the short version of the story is this: it inspired me to do more sharing. More reusing. Less throwing away. Less buying everything brand new. As in most endeavors, it’s an ideal that I aspire to, not a rule that constrains and burdens me. I truly find joy in it.
People are having babies all over the place, all the time, and every year there’s a new batch of baby products, gear, and equipment being bought, sold, donated, and thrown away. Nothing delights me more than passing along my baby’s stuff to someone who needs it, or reusing it for a new purpose, and making sure that all the “stuff” in my story is really being used to its full potential.
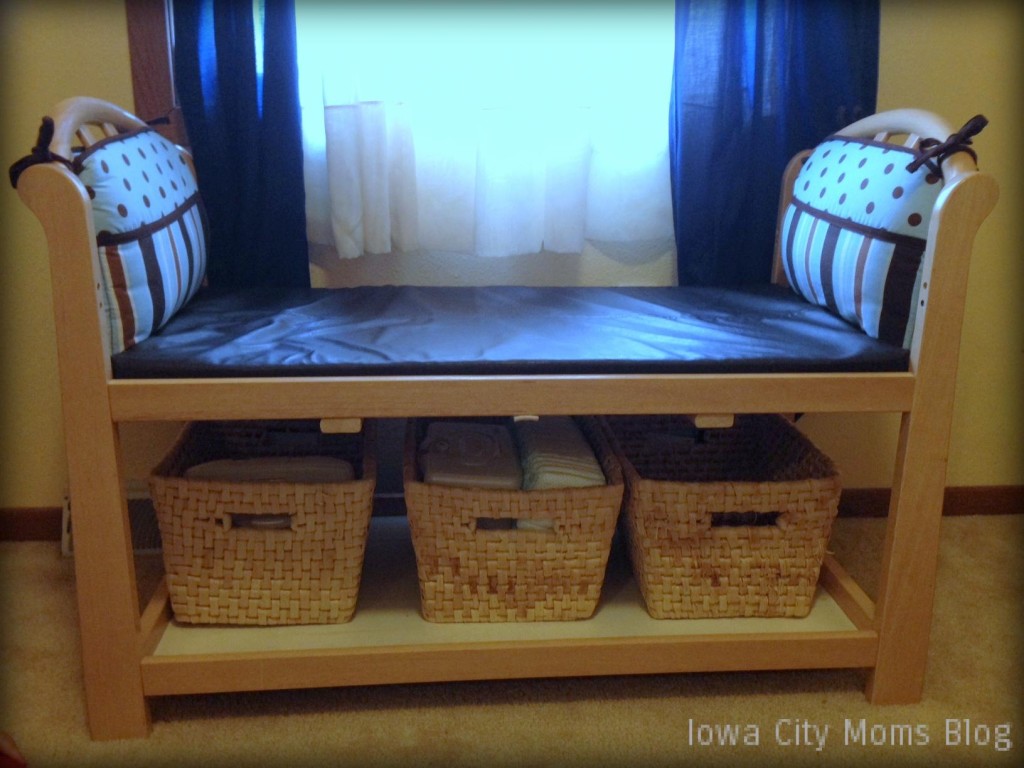
Which brings me to: changing tables and crib bumpers! Not everyone uses these products, but those who do will come to a day when they aren’t all that useful anymore. Instead of getting rid of them, turn them into an awesomely useful, adorable, already-matches-the-bedroom-décor bench seat! I got the idea because my son is a little shorty. He wants to look out of his window in his bedroom SO BAD, but his short little legs just don’t do him any favors. Poor kid just wants to see the birdies and puppies and trees! So I thought, “Hey! Why not hack off the legs of his changing table and turn it into a sweet little window-seat bench?” And THEN, why not use his old crib bumpers for a no-sew alternative to cushions on the sides of the bench? This project is EASY. 5 steps and you’ll have something like this!
 CHANGING TABLE + CRIB BUMPERS = READING BENCH:
Materials:
Changing table
Tie-on crib bumpers
Measuring tape
Pencil
Saw (we used a power circular saw)
Screwdriver
Screws (I only used 4)
Sandpaper
Bench Cushion (changing pad or craft foam)
Fabric
Needle and thread
Duct tape (optional)
Liquid Stitch fabric glue (optional)
Sewing machine (optional)
1) Measure Twice, Cut Once:
Decide how high you want your bench to be, taking into consideration where you will put it and what your space allows. My changing table had three shelves, and I cut it off just under the middle shelf, leaving the top shelf to be the seat of the bench and the middle shelf becoming a storage shelf underneath. Measure each leg from the bottom, mark with a pencil, and use a straight edge to complete the line.
2) Demo That Table:
- Saw off the legs, using your saw-of-choice. Stand up the bench on its new feet to check that they’re level, and sand down the rough edges of the feet with sandpaper.
- While you’ve got your saw out, chop off the side guard rails at the top of the changing table. (Save these for the next step!)
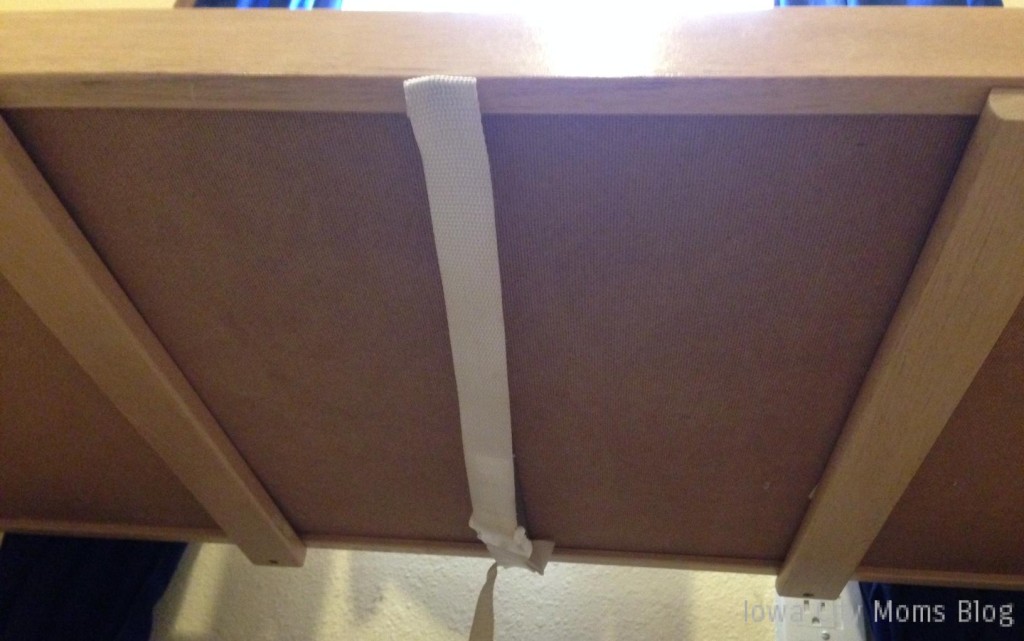 3) Make it Sturdy:
Add some cross-beams underneath the “seat” of the bench. Assuming that a child sitting on a bench is a heavier load than a baby lying down, you’ll want the bench to be extra sturdy. To do this, cut the guard rails down to the right width, and use a couple screws to attach them to the bottom of the seat. These won’t really be seen, but by reusing the guard rails, the wood or paint color will already match!
4) Assemble your seats:
- Option 1: Use your old changing pad as the new bench seat. Just give it a good bleach bath and cover it with your favorite changing pad cover!
- Option 2: Purchase a new changing pad. They’re already made to fit there, right?
- Option 3: Purchase craft foam, cut it to size, and cover it with fabric. This is the option I chose, because I didn’t have a changing pad to begin with. I used a fake leather fabric (from some awful bedroom curtains that we inherited when we bought our house) that would be sturdy and stain resistant. You can choose any fabric you want, and follow these steps:
- Lay your foam piece on the *right* side of your fabric. If you have multiple pieces of foam that you are fitting together, duct tape the pieces together to make the whole bench seat. If your fabric is at all transparent, just tape the bottom.
- Pretend you’re wrapping a present: fold the fabric over the foam and cut off excess width, leaving a little extra just in case. Don’t worry about the length for now. Using your sewing machine, a needle and thread, or even just duct tape, with your fabric inside out, sew a straight line down the long way to make a long tube with open ends.
- Turn the tube right side out, and slide/stuff the foam into the tube. It should be a snug fit. This step will feel a little bit like getting your two-year-old dressed.
 Fold the fabric up and around the ends of the tube, just like you’re wrapping a present. Once the ends are folded neatly up and under, secure the fabric down by hand-sewing it shut. It will be on the bottom of the cushion, so who cares what it looks like! Just sew it securely down. Alternately, I totally cheated on this step and instead of sewing the ends shut, I used duct tape and Liquid Stitch fabric glue. Classy, right?

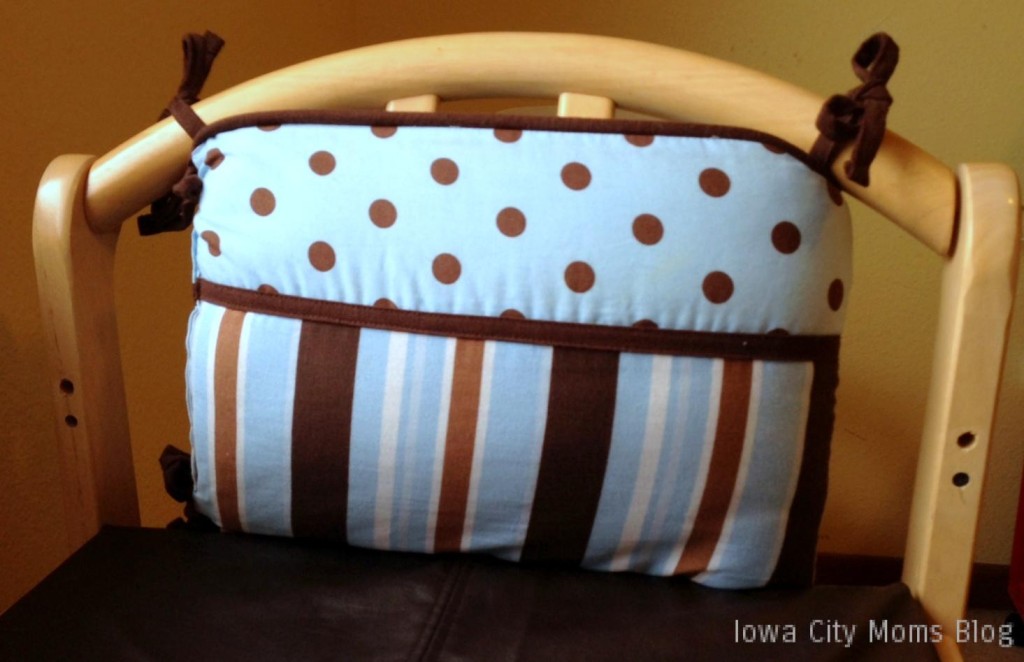 5) Bumper “pillows”:
Using the two short pieces of crib bumpers, fold each one in half and slip it around each end of the new bench. You might have to move it in one bar or two to make it centered, depending on how it fits. Use the string ties to tie it to the bars. I used the bottom tie to attach each side of the bumper to the other, and the top tie to secure it to the top rail. It doesn’t really matter. Just tie it on however it works best!
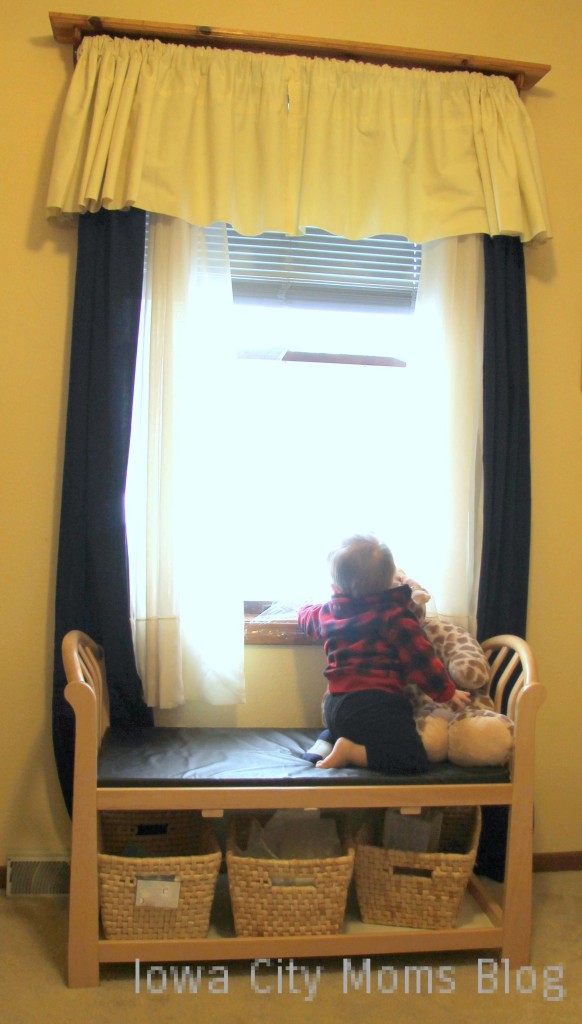 That’s it! Add some baskets underneath if you want, and you’re done. Plunk it in its new spot, show your shorty babies their new vantage point, and admire your crafty upcycling skills! No one has to know about the duct tape…


Thanks for sharing a great details about Changing Table. I am also writing an article around it. Your article have given me good idea about what to include and what n ot to.