


A few weeks ago one of my daughters found a craft project she wanted to try. The project was described in her American Girl Magazine and the title of the craft project was something along the lines of “No-Sew Tutu.”
I have to say I was immediately suspicious. In my experience, many “no sew” projects involve glue guns or irons, or some other way to fuse fabric together that would just be easier to buzz through a sewing machine. (This makes me sound like I have a sewing machine . . . I don’t. I don’t even have a sewing kit anymore.)
However, as I started to read the instructions, I realized this was doable! The supplies needed were tulle and ribbon. (Again, short supply lists make me a little suspicious . . . Would this really end up looking like a tutu or could this project be featured on a Pinterest Fail website?) After deciding my daughter and I would attempt the project, we lost the magazine. But, this project was so easy I was pretty sure I could recreate the no-sew tutu. If you happen to have the American Girl Magazine, I’m not sure how closely the instructions I’m about to give match the original. Either way, it was fun to make and she’s had even more fun playing with it (although the maneuvering of the tulle proved difficult for 6 year-old fingers)! Here’s how to create your own legit no-sew tutu with four things:
No-Sew Tutu Tutorial
Supplies
Wide ribbon (without wire)
2 Spools of Tulle (we used 3, because I made one for her little sister too)
Marker
Scissors
Directions
1.Begin by cutting a piece of ribbon that wraps around your child’s waist twice
2. Divide the ribbon into thirds (just eyeball it) and mark the middle third of the ribbon with the permanent marker–this is where you will attach the tulle
3. Measure the tulle. I measured the length from my daughter’s waist to her knees. You will need lengths of tulle twice as long as the length you decide on.
4. Cut the tulle. Cut the entire two spools of tulle to the pre-determined length.
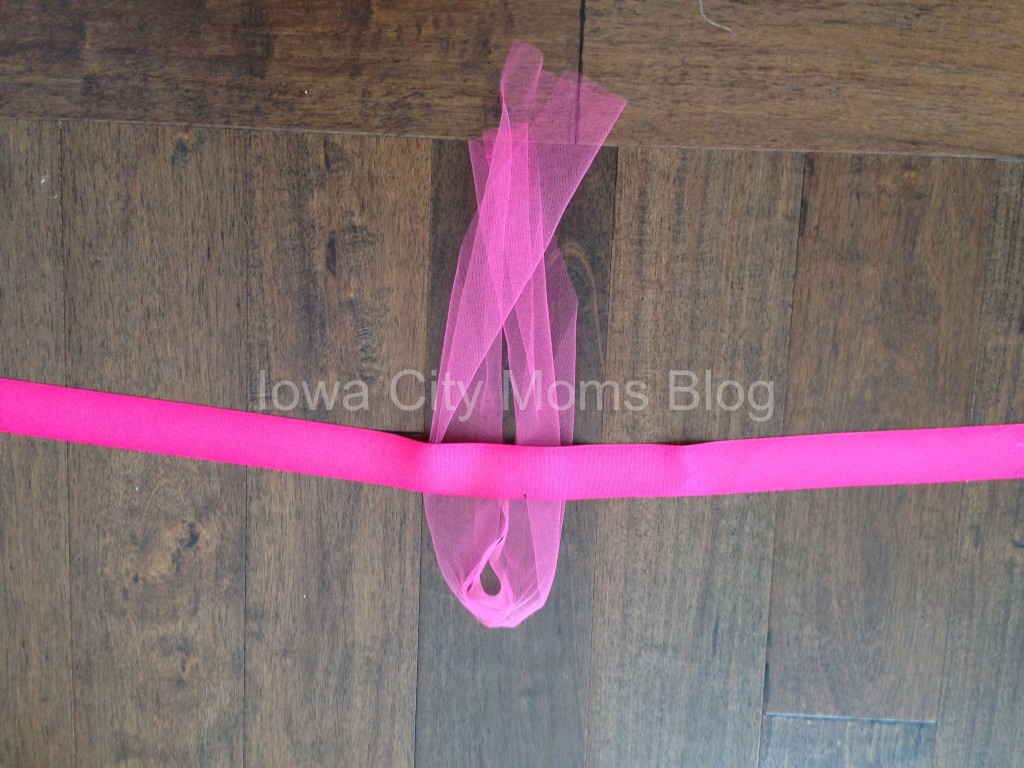
5. Attach the tulle to the ribbon. The ribbon serves as the waistband of the tutu. Fold the tulle in half. Put the tulle under the ribbon. Take the loose ends and pull them through the loop you’ve created by folding the tulle in half. Pull tightly to attach to the skirt.
6. Repeat until you’ve used all the tulle.
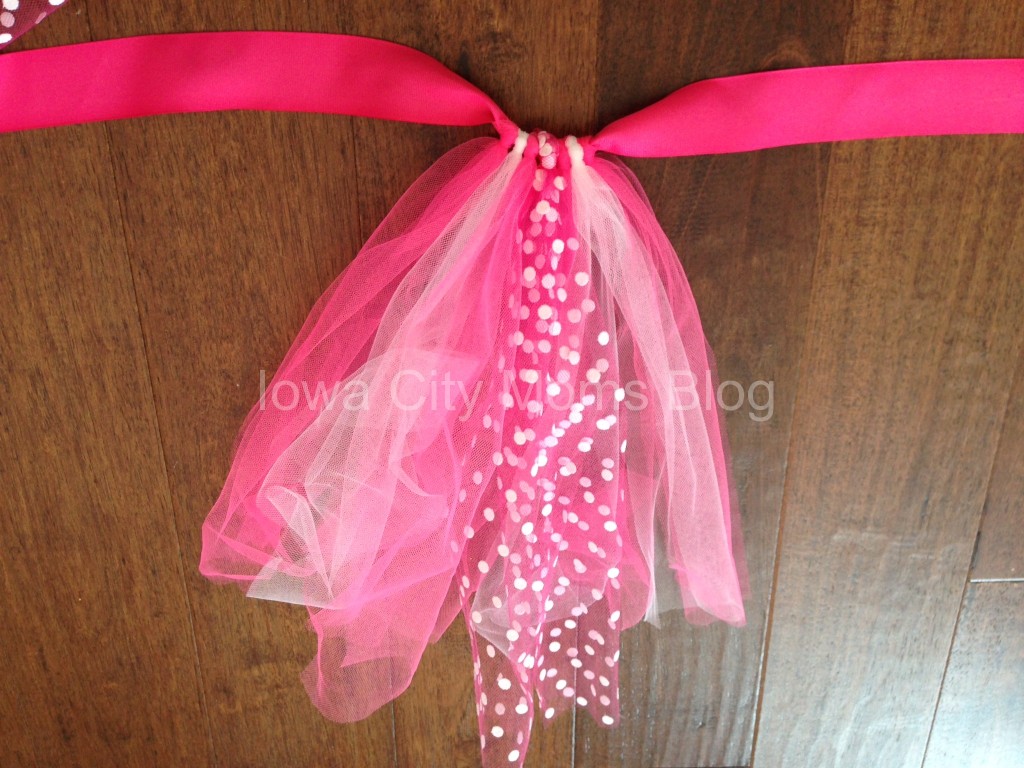
7. Tie around your child’s waist.
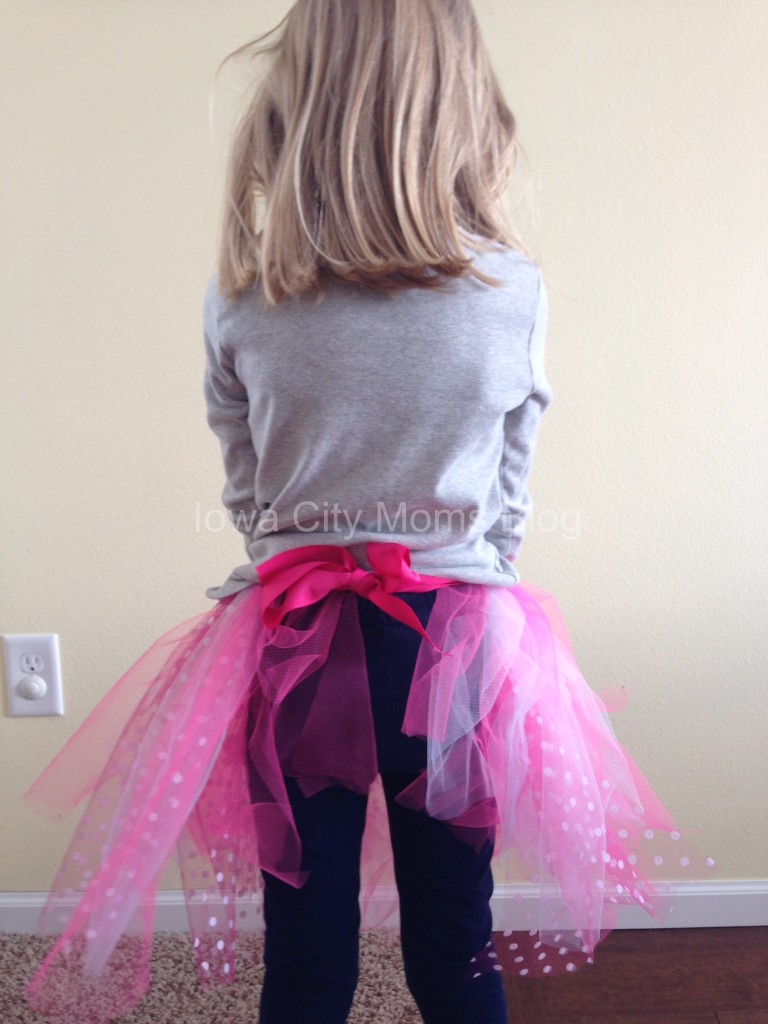
8. Play pretend!
If you end up making one, I’d love to see the pictures!
Happy no-sewing!


")


Thanks for sharing this! Michael’s had ribbon on sale this week, so I bought lots and made two ribbon skirts using your tutu method. This really couldn’t be any easier, even for someone like me who is more inclined to have “Pinterest Fail” moments rather than awesome looking crafts.
Ha! I bought all of my supplies with a Michael’s 40% off coupon a few weeks ago! Glad you avoided the dreaded “Pinterest Fail” too 🙂
what a great idea! I made one similar for a halloween costume, have to make sure the tulle is stiff enough.