


My oldest child celebrated his 15th birthday a few weeks ago. As your kids get older, birthday celebrations evolve with each passing year. For instance, the piles of brightly wrapped packages give way to the “one big gift.” Frantic runs through the toy aisle are usually replaced with a trip to Best Buy, or, if you’re lucky, your shopping is complete after five minutes on Amazon.
I was never sentimental about this change. I was especially glad most of our kids outgrew themed birthday parties before the doom of Pinterest. Now, don’t misunderstand me—I, of course, love celebrating my kids’ birthdays. It’s just that I lack the basic culinary, decorating, and hostess skills needed to throw a decent party. Back in the day, arranging the plastic superhero dinnerware was enough to cause a stress headache underneath my Spiderman party hat.
So as the years passed, we embraced the simplification of our kids’ birthday celebrations. This didn’t make their days any less special, and it helped all of us focus on what was truly important: being together as a family.
However, something hit me this year as my oldest son’s birthday rolled around.
Three.
That’s all we have left. Three birthdays with him living under our roof.
This was one of those parenting realizations that hits you like a ton of bricks. And although I know we will celebrate birthdays with him in the future, I realized I had always taken the togetherness of our kids’ birthdays for granted. Suddenly, I felt the sensation of his childhood slipping through my fingers, like sand.
We still kept his celebration simple. We ordered some DVD’s from Amazon and took him out to dinner at his favorite restaurant. However, my bittersweet epiphany stirred something in me. I felt compelled to do something that is emphatically against my nature.
I decided to bake a cake.
Not only was I going to bake a cake, I was going to decorate it with FONDANT. Homemade fondant. Making homemade fondant seemed like a tall order considering my lack of culinary skills. But based on my past attempts at decorating with frosting (I can never get the consistency right. Even when I follow the directions perfectly, my frosting always comes out like glue), fondant seemed like my best chance. Since I knew making the fondant was going to be a huge challenge for me, I decided to enlist some helpers. My husband baked the cake, and my daughter helped me with the fondant.
I was pleasantly surprised to discover there are very simple fondant recipes out there. I found this one on About Food.com, and it worked quite well.
Homemade Fondant Recipe
What you need:
- 8 oz. mini marshmallows
- 1 pound powdered sugar, plus extra for rolling and dusting
- 2 teaspoons of water
Preparation:
1. Combine the water and the marshmallows in a microwave-safe bowl. Microwave on high for one minute, or until the marshmallows are puffy and melted. (I ended up needing another 30 seconds on mine.)
2. Using a wooden spoon, stir the melted marshmallows until they are smooth. Begin gradually adding powdered sugar. You’ll need to continue stirring until the mixture becomes very stiff. Keep adding the powdered sugar until the mixture becomes impossible to stir.
3. Begin kneading the fondant until it is smooth. It should be about the consistency of stiff play-doh. You’ll find that it’s very sticky, so you’ll need to keep dusting your hands and work surface with powdered sugar.
4. I learned that there are a couple of ways you can tint your fondant. (I used the Wilton frosting dye for my project.) If you’re using one color, you can add it to the marshmallow mixture before you combine the powdered sugar. I needed two colors, so I separated the mixed fondant and tinted accordingly. This required a second round of kneading to blend the color evenly. (If you use this method you might want to wear plastic gloves to avoid staining your hands. This was something I realized after my hands turned bright red.)
5. Before you begin rolling your fondant, you will need to frost your cake with a very thin layer of buttercream frosting to help “glue” the fondant in place. DO NOT SKIP THIS STEP. Trust me; I did a lazy, halfway job on this and the fondant didn’t adhere to the cake very well.
6. When you have the color at the right consistency, you can begin rolling the fondant. This is where my remedial kitchen skills took over. I really struggled to get the shape and the consistency right. When I draped the fondant over the cake, the bottom was mangled and uneven. I ended up leaving it; it was victory enough that a majority of the cake was covered.
In the end, my fondant actually came out fairly well. And my husband did an outstanding job baking the cake. Some of us actually preferred the more subtle taste of the fondant to a heavy, overly sweet layer of frosting.
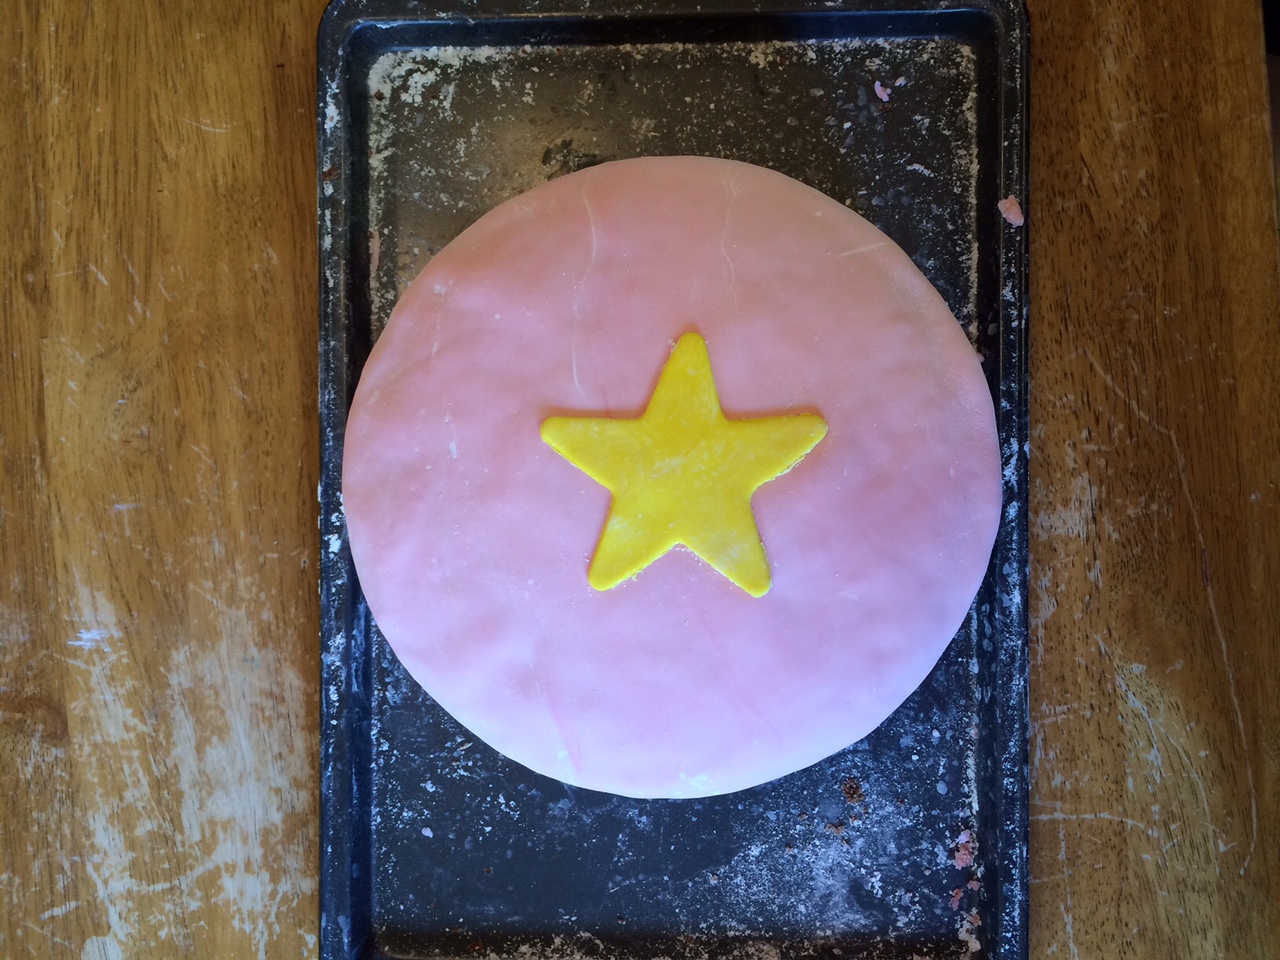
The cake design is based on one my son’s favorite shows, Steven Universe. Steven is a character caught between two worlds: the human world, and the world of the Crystal Gems.
Caught between two worlds. This is something our family can relate to right now, as we watch our oldest grow from a child into an adult.
A fitting tribute for his 15th birthday.


